Introduction
On older CNC controls, disk management is a nightmare. There is no concept of a directory structure. You are given a flat namespace populated by arbitrary four-digit integers prefixed with O—like O00012 or O00974. Loading a job meant hunting for an unused integer ID and praying the machine’s internal memory had enough bytes left to fit the text file.
The shop's FANUC 0i-TF Model B control is a significant improvement over these older systems. It includes real directory support, allowing programs to be stored with descriptive, human-readable identifiers. This makes organizing jobs around drawing numbers far more sensible—especially when handling components with multiple ops or varied raw material states, such as machining an AXT crown from both hot-pressed and infiltrated sintered blanks.
However, the user interface falls short when it comes to backups.
While exporting files from a single directory to external storage via the front panel is simple enough (select all, switch target storage, paste), FANUC provides no obvious mechanism in the standard file manager for recursive directory dumps. If you have two or three folders, stepping through them manually is merely annoying. If you have dozens, it becomes an unacceptable waste of time.
Here is how to solve this and cleanly back up an entire folder tree in one operation.
My backup methodology
I run a complete backup of every CNC program across our machines every Monday morning.
The process is simple: I take a dedicated USB drive to each machine, execute a full recursive export, and mirror the resulting backup image to off-site storage. This satisfies a basic 3-2-1 backup strategy. Re-proving G-code, dialing in feeds, and tweaking custom macro loops takes far too much time to rely on the volatile storage of a single machine tool.
Prerequisites
Before starting, ensure your machine configuration and storage media are prepared correctly:
Configure the I/O Channel
Open your parameters screen and verify that the I/O channel is set to 17. This routes file operations to the front panel USB port rather than RS232. (Do not alter control parameters unless you know what you are doing. If you are unsure, have a qualified technician handle it.)
Format the USB Media
The control software expects a standard FAT32 file system. Format the drive accordingly on a workstation before inserting it into the panel. The machine will fail to recognize exFAT or NTFS partitions.
Exporting the directory tree
Press the SETTINGS key on your panel, usually located close to the PROGRAM and OFFSET keys. It will display a screen similar to this:
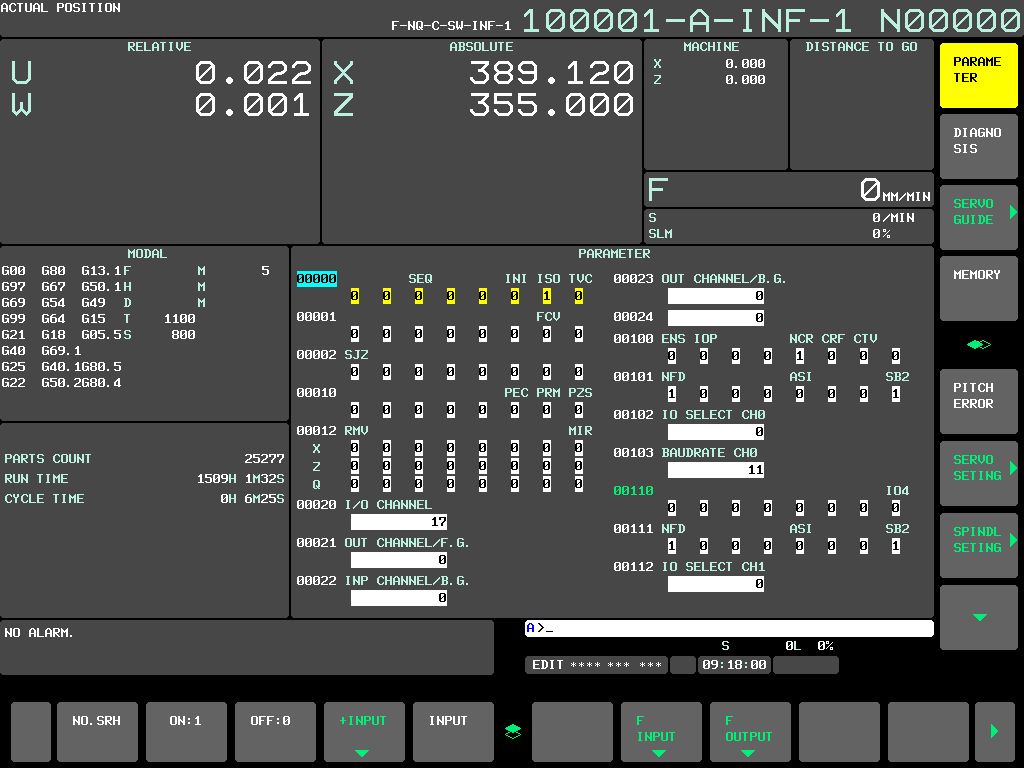
This is the same screen where you can change the I/O CHANNEL parameter to 17 which saves/loads programs from the USB. Scroll down until you see the ALL I/O soft button.
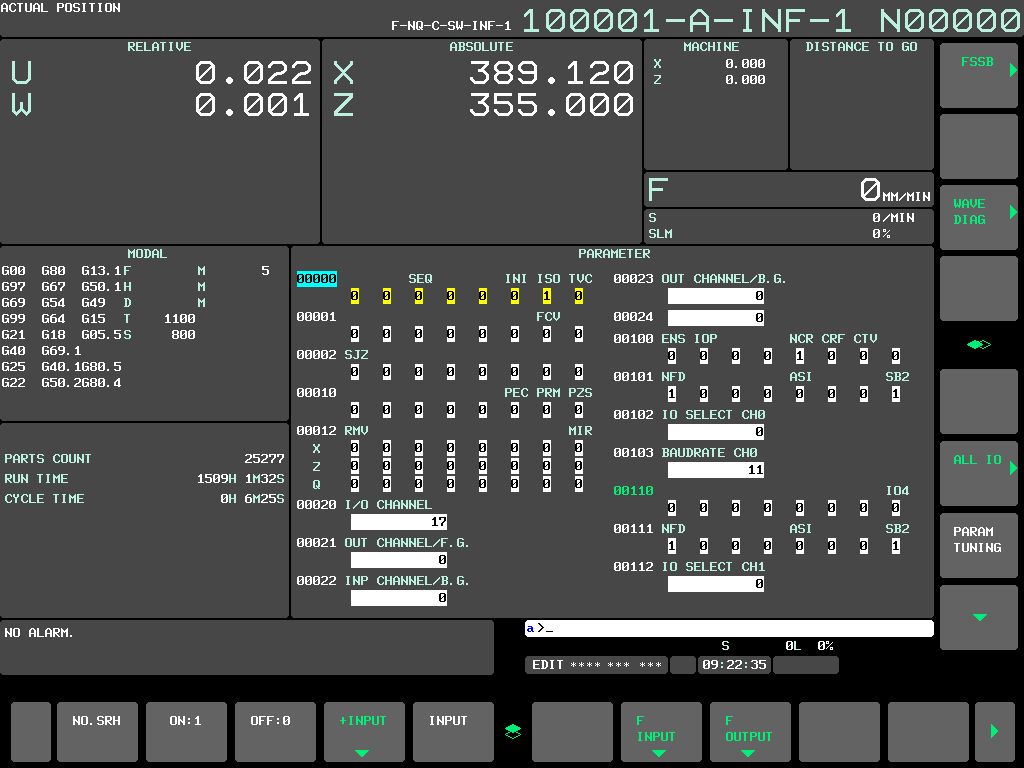
Press the ALL I/O soft-button, and you will be at this screen:
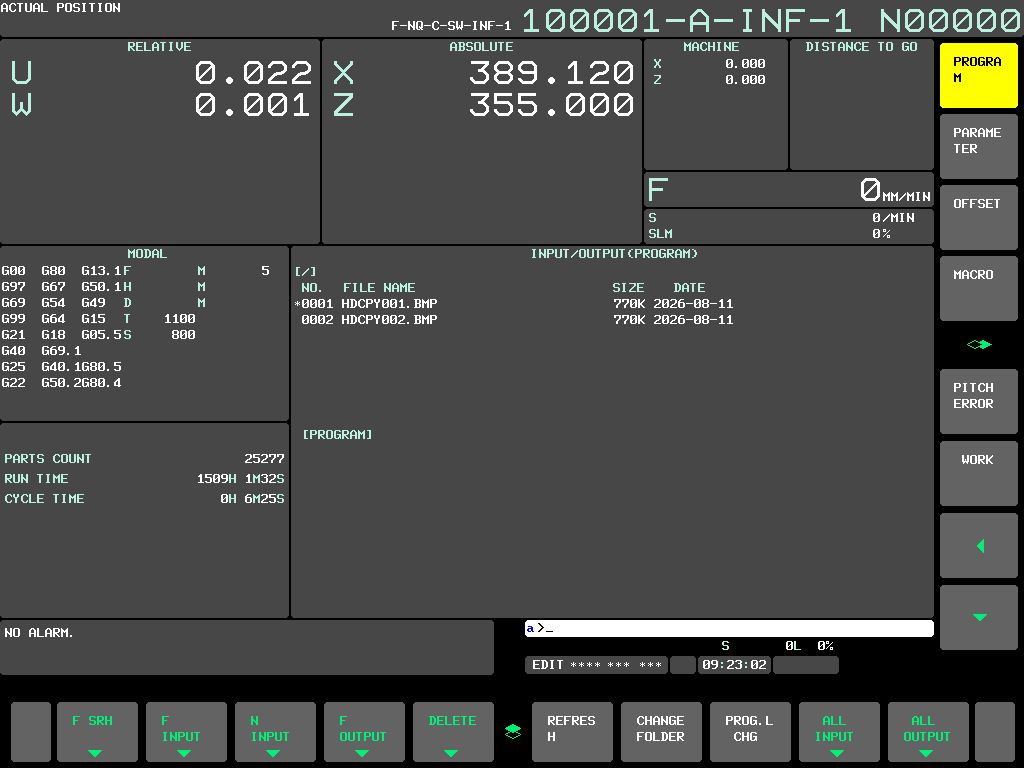
Here you can see some of the files which are on the USB at the moment. Press the F OUTPUT soft button to start the export. The screen will look like this:
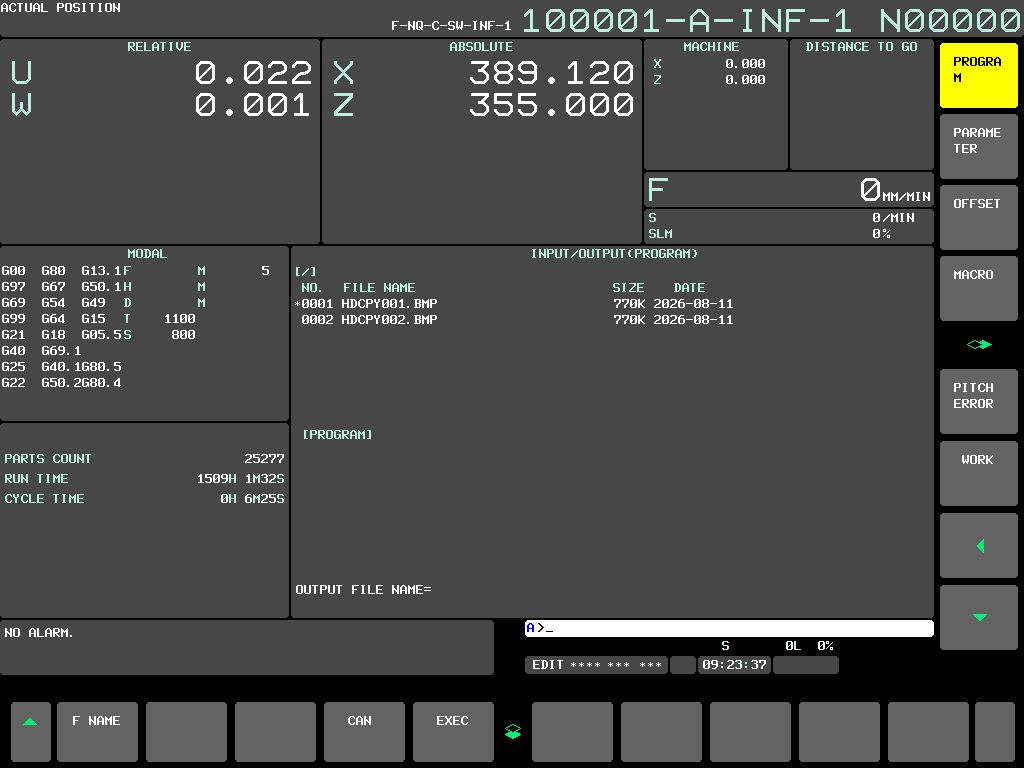
It’s time to give the output name. Press the F NAME soft-button to start punching in the name. I like to write the machine name and the current date. This allows me to easily search for the exact file later when required. For example, this is what I used on the particular machine:
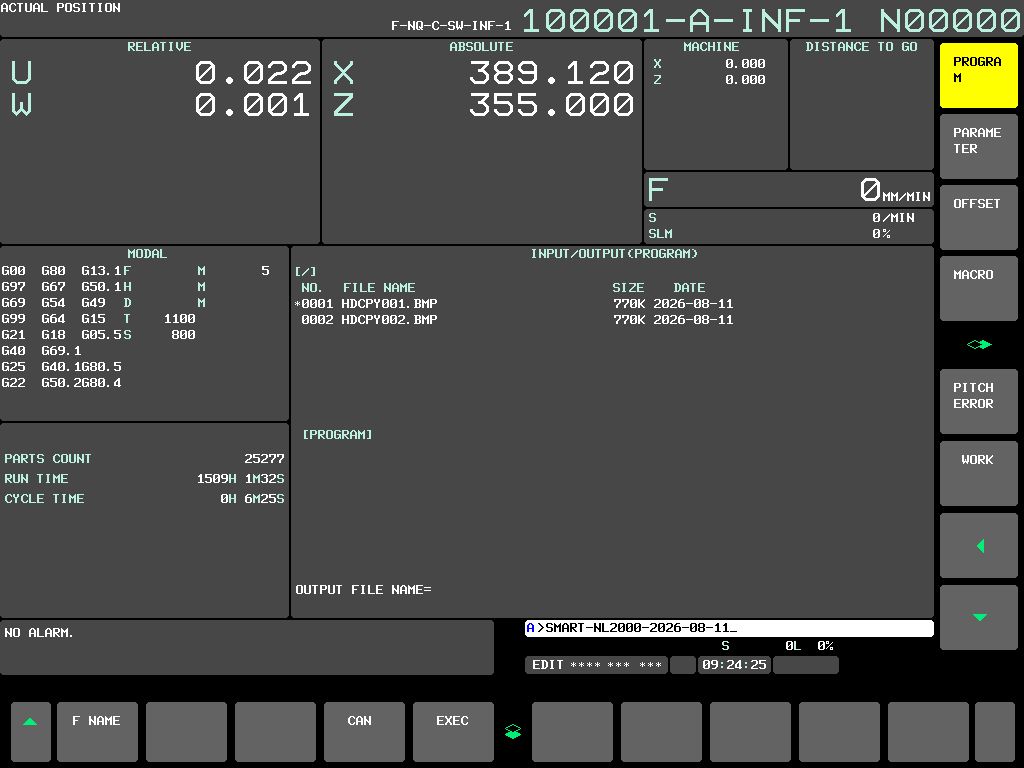
When you are happy with the name, press the EXEC soft button, then the panel will confirm the name, for example:
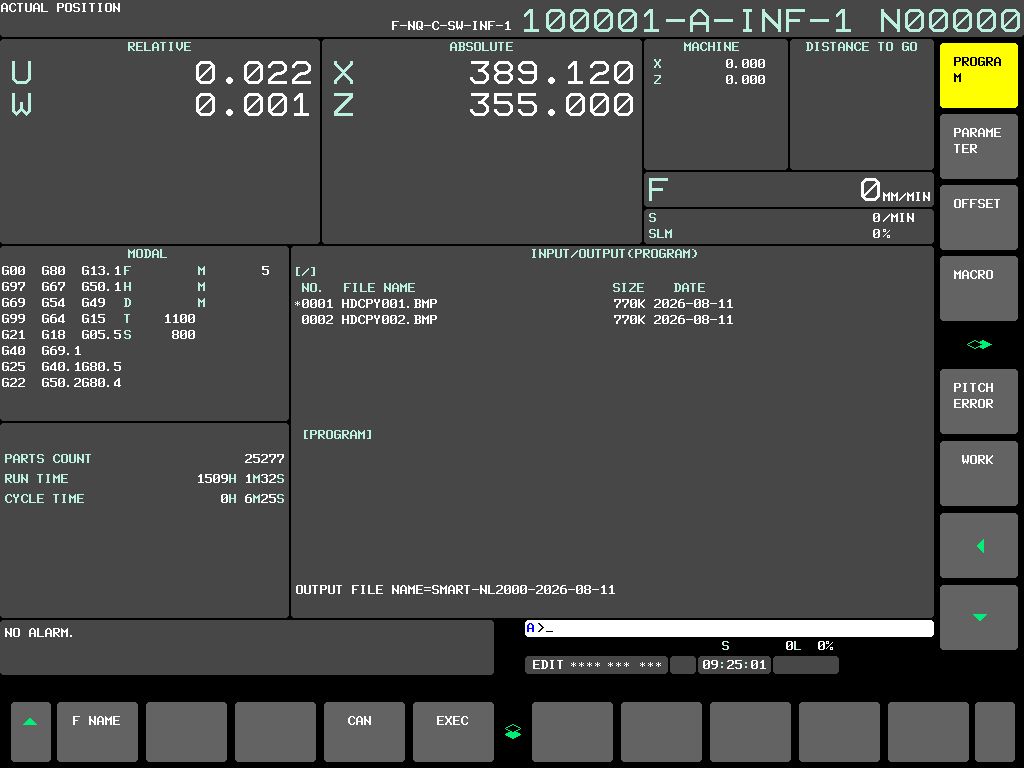
When everything looks good, you can press the EXEC soft-key again, and the file will be written to the USB. You can see the file appear in the list of files now as shown here:
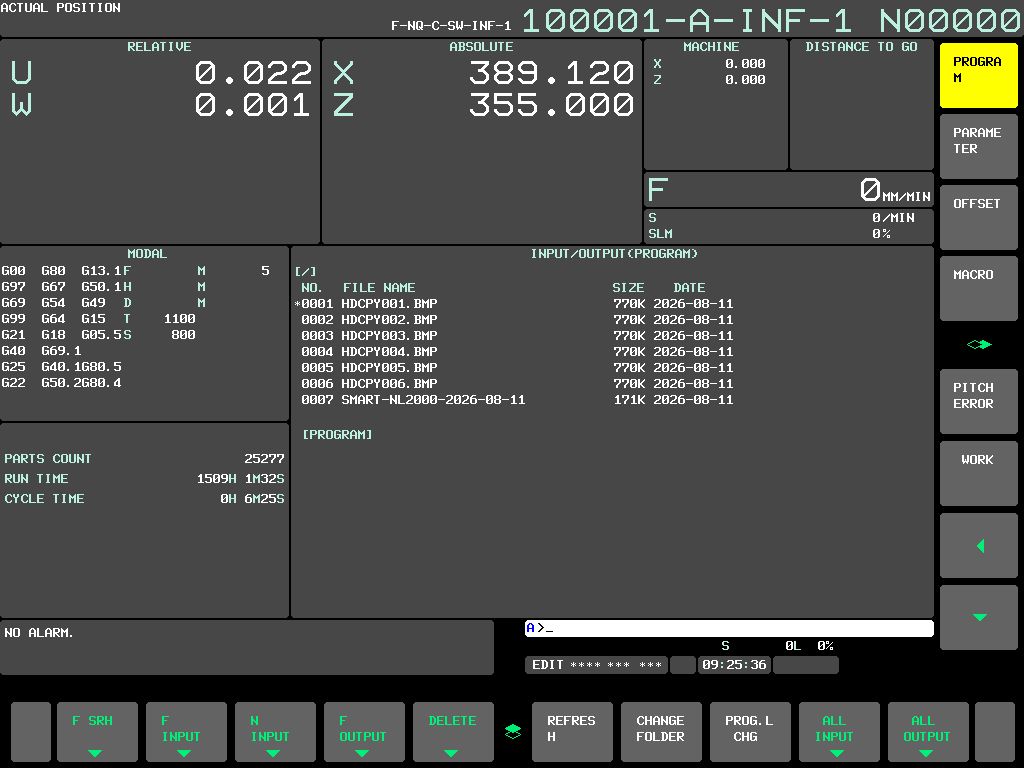
Once finished, pull the drive and commit the files to your secondary backup storage. It takes less than a minute and eliminates manual navigation entirely.